In previous Primaloc Highlights articles, we've talked about a wide variety of conventional project types, including bar tops, table tops, kitchen countertops, and more.
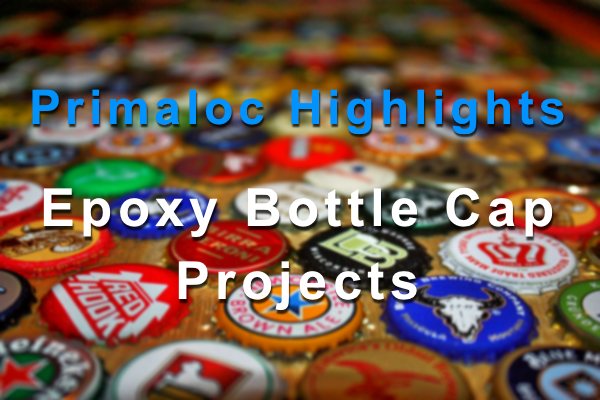
But there are still so many aspects of epoxy that we've yet to highlight through this series. For this article, we'll be focusing on one in particular—the bottle cap epoxy project.

The Appeal of Bottle Cap Epoxy Projects
Bottle cap projects are popular for several reasons.
Easy to Apply
The first is that bottle caps are easy to position, making it a breeze to affix them to your project substrate at the start—or even partway through the epoxy application process.
Additionally, the form of bottle caps is excellent for bonding with epoxy resin, ensuring a strong hold.
Stunning Variety
Bottle cap projects are also highly customizable. The average bottle cap's simple yet aesthetically appealing shape and size represent great potential, and a selection of them can easily be arranged in all manner of pleasing patterns.
Moreover, there are thousands of beverage brands feature their own distinct bottle cap designs, reflecting their branding and evolving over years of marketing. These provide an extensive selection of bottle caps to choose from when designing your project.
And gathering a collection of bottle caps to use in your project can also be enjoyable. Many users find the experience gratifying, as they gradually compiling a unique collection to use in your creative endeavor.

Choosing the Right Epoxy
One aspect that some users overlook is their choice of epoxy for any project. There are many types of epoxy available these days, and the internet is especially flooded with new brands and variants.
But not all epoxy is right for the job, and there are two major aspects you should consider before making a purchase:
- The Type of Epoxy
- The Quality of Epoxy
The Type of Epoxy: Choosing the Best Resin for the Job
Something many people don't realize is that epoxy isn't just one thing. In fact, there are many different variants of epoxy, each meeting different benchmarks and suited for different things.
At Primaloc, we provide the two types of epoxy that are best suited for most domestic projects; these are our Bar & Table Top Epoxy and Deep Pour Epoxy, and each has a role to play in bottle cap epoxy projects.
Bar & Table Top Epoxy
Bar & Table Top Epoxy is the stronger and more viscous option of the two. This type of epoxy is chosen for the vast majority of epoxy projects, but isn't always suited for coating embedments, which can be larger than the epoxy's max layer depth.
For a typical bottle cap project, which involves a single layer of bottle caps affixed to a substrate, the Bar & Table Top Epoxy is the perfect choice. It's natural self-leveling nature supports a layer just thick enough to coat the bottle caps and cure with a clean, clear finish.
Deep Pour Epoxy
Deep Pour Epoxy is less viscous and not quite as strong as its counterpart, but has a unique advantage due to its ability to be poured in thick layers (of up to two inches!).
Though it's not frequently needed for bottle cap epoxy projects, Deep Pour Epoxy is the right choice for any project that requires an extra thick epoxy finish. Examples of such projects include those with a thick resin mold to fill (such as resin art), most river tables, and pure epoxy table tops.

The Quality of Epoxy: Watching Out for Subpar Resins
Epoxy is beautiful. When handled properly, a good resin product cures to a crystal-clear finish, showcasing the beauty of any elements beneath its exterior. But not all resins are crafted with equal care.
These days, there is a tremendous amount of different epoxy brands, many of which are less than a few years old. Among these brands are many with a surprisingly low cost, often with numerous glowing reviews. But unfortunately, it's easy to manipulate the system on many 3rd-party marketplaces, allowing dealers to set up the same product under many names with the goal of grabbing quick sales from first-time customers.
Sadly, products from dealers willing to do this are almost invariably low quality. The seemingly low cost of entry actually comes at a high cost to quality, as the resins are frequently produced with cost-cutting measures that reduce the clarity and strength of the epoxy product.
Aspiring epoxy users may be tempted by this lower price, but it often spirals into a much greater cost once the low-quality resin fails to meet expectations. Visual deficiencies can results in a murky or cloudy finish riddled with blemishes, instead of the glasslike clarity epoxy is known for. Physical deficiencies can result in a finish that breaks down early, with cracks, soft spots, or deformities in this project showing up over a short period of time.
To avoid this issue entirely, look for a credible source of epoxy with trustworthy reputation. By choosing quality upfront, you'll save in the long run, ensuring yourself the quality of supplies you need to achieve your goals.
At Primaloc, we offer only high-grade premium resins. Our resins cure crystal clear and can withstand tremendous stress without giving in.
You can find both of our premium resin products on the following pages:

How Do You Embed Bottle Caps in an Epoxy Project?
Embedding bottle caps into an epoxy project is actually quite simple. Because of the uniform shape they (nearly) all share, it's easy to adhere a lot of them in a short period of time.
Where to Embed Them
Most epoxy projects have a substrate over which the epoxy is applied. Some epoxy projects—typically resin art—don't, instead using a resin mold to which the epoxy can't bond, allowing it to cure and then be removed as a solid piece. Depending on which of these kinds of projects you're doing, you'll have different options for where and how to embed your bottle caps.
For projects with a substrate, you can either:
- Affix your bottle caps to the substrate surface itself, prior to your epoxy pour.
- Pour a layer of epoxy, let it cure, then position you bottle caps on that instead, before finally applying another layer of epoxy to immerse them.
For projects with no substrate, you're left with just the immersion method as there is no substrate to adhere the caps to.

How to Embed Them
As for how to adhere the bottle caps, there are a couple of common methods.
#1: The Glue Down Method
The first method is to use glue to adhere the bottle caps to a substrate surface (e.g., wood). This is done with ordinary glue, which will have no issue with the epoxy as it starts to bond later. Hot glue and super glue should not be used for this method, as they can have trouble bonding with the epoxy later.
To perform this:
- Apply some glue to your bottle caps or substrate and arrange the caps as desired.
- Give the glue time to fully dry
- Apply your epoxy seal coat. Be sure to coat the bottle caps as well. This will typically involve a larger than normal seal coat.
- Give the seal coat time to partially cure (about 4 to 6 hours), then continue with your project.
#2: The Seal Coat Method
The second method is to skip the glue part and just brush a thick epoxy seal coat onto the substrate surface.
A seal coat is an important step in the typical epoxy process, as it release air and seals in pores on a substrate to prevent air bubbles from showing up in the finish later. With a heavy seal coat, though, you can also adhere small items like bottle caps.
To perform this:
- Apply an thicker than normal seal coat to your substrate.
- Immediately position the bottle caps in it (be sure to wear gloves!) and press them down, they should settle in the seal coat.
- Further coat the bottle caps to seal them in as well.
- Let the seal coat partially cure (about 4 to 6 hours), then continue with your project.

Consider Theming Your Project
When planning your bottle cap project, think about how you'll arrange the caps. What pattern will you create? Which designs do you find most appealing, and can you organize caps by similar colors to enhance the visual impact?
These decisions can help personalize your project.
If you're interested in exploring further, there are creative ways to incorporate bottle caps into broader themes.
For instance, you might combine bottle caps with sports memorabilia to create a sports-themed piece, integrating photos or items related to baseball. Or, if you're a card game enthusiast, consider crafting a poker-themed epoxy table, using bottle caps to add color or frame card-related collectibles.
Ultimately, the design is entirely up to you; feel free to expand your vision if you're drawn to creating something more intricate.

Primaloc Epoxy: Premium Epoxy for Premium Results
With our premium Bar & Table Top Epoxy and our Deep Pour Epoxy, Primaloc gets the job done. Our epoxy resins are premium-grade, with high performance in every category, including:
- Unmatched Strength: A Primaloc finish won't buckle, even under high pressure.
- Long-Lasting Resilience: Primaloc epoxy lasts for many years with minimal care, and can endure high-traffic environments with ease.
- A Crystal-Clear Coating: With its pristine, transparent appearance, looking at a cured Primaloc coating is like peering through a window.
Epoxy resin can be beautiful, strong, and long-lasting—which is why you shouldn't compromise on quality. With Primaloc Epoxy Resin, you get the ultimate finish in durability and visual appeal.
Protect your surfaces by giving them a rock-solid epoxy finish. Choose strong. Choose reliable. Choose Primaloc.