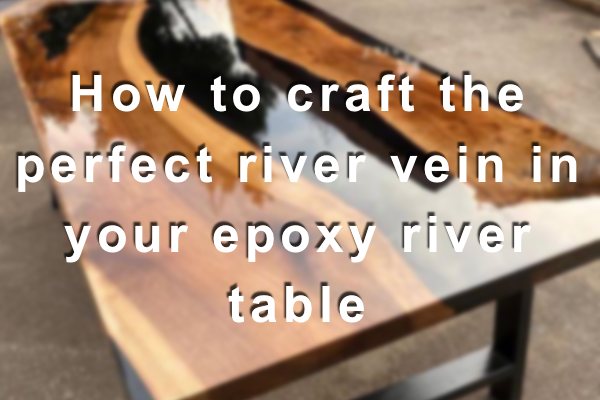
Among common epoxy projects, the epoxy river table stands as an emblematic example of elegance in simplicity. It's admired for the captivating river vein that seems to flow through the tabletop’s substrate.
With designs that are not only striking but also highly customizable, epoxy river tables represent a tremendous amount of creative potential for creators through their choice of substrate material and shaping it, which in turn determines the river vein’s path.
Attaining a flawless, unblemished river vein, however, calls for an understanding of the method and close adherence to each technique. In this article, we provide a detailed, step-by-step guide to help you create the perfect river vein in your epoxy river table project, ensuring both beauty and precision in your work.
What Is a River Table?
A river table is a type of furniture where the tabletop is crafted using epoxy resin alongside segments of a chosen substrate material.
Typically, this involves a vein of epoxy that is poured between two large pieces of the substrate material. The vein binds them together once cured, and it is typically decorated or colored in some way.
Choosing the Right Substrate
Almost any solid material that effectively bonds with epoxy can be used as the substrate, though certain materials are preferable.
Wood is most commonly used due to its versatility and aesthetic appeal. Many craftsmen choose live edge wood, which preserves the wood's natural edges and texture, adding a unique organic look to the table.
Designing the River Vein(s)
While traditional river tables feature a single, bold epoxy vein, the configuration of your substrate can allow for multiple veins. These can run parallel or diverge in various directions depending on the arrangement of the wood pieces and the gaps left for the epoxy to fill.
Most river tables are constructed using two large pieces of live edge wood set roughly parallel, creating a central channel where the epoxy "river" flows. However, using three or more pieces can introduce additional channels, expanding the complexity and beauty of the design.
Primaloc Epoxy: The Top Choice for Crafting River Tables
Selecting the right epoxy is essential for any project, especially for river tables where clarity, durability, and ease of application are key. Primaloc Epoxy stands out as the superior choice for crafting river tables, ensuring a flawless finish essential for perfect river veins.
Avoiding lesser quality brands is crucial, as a high-grade resin is fundamental to avoiding imperfections.

Two Ideal Epoxy Types for River Tables
Primaloc offers two specific types of epoxy suited for river table projects, tailored to meet different project requirements and creative ambitions.
Primaloc Bar & Table Top Epoxy
Our Primaloc Bar & Table Top Epoxy is versatile and widely used for sealing surfaces like countertops and bar tops, providing a robust, crystal-clear finish. It's suitable for crafting shallower river veins and for applying an overall topcoat to your project.
However, for deep epoxy veins, its use is somewhat limited by the maximum depth of layer that can be applied without encountering issues like air bubbles.
Primaloc Deep Pour Epoxy
For deeper, more striking river veins, Primaloc Deep Pour Epoxy is the ideal solution. Its low viscosity allows for pouring thicker layers without the risk of forming imperfections such as air bubbles, making it perfect for ambitious river table designs.
Both our Bar Top and Deep Pour Epoxy are highly compatible with colorants, allowing for vibrant, customized color schemes that enhance the overall design.
Find both types of Primaloc Epoxy on the following pages:
Achieving the Perfect River Vein: A Detailed Guide
Crafting a stunning river vein for your space, whether for your home or a commercial setting, requires preparation, careful application, and a focus on details. Here's a detailed step-by-step guide to ensure you achieve a perfect river vein. We'll use wood in our example, as it's the most commonly chosen substrate, though many other materials are also suitable.
Step #1: Select and Prepare Your Wood
Begin by selecting two or more wood slabs that align well but leave a gap to create your desired river effect. Live edge slabs are favored for their natural, irregular edges that contribute to a more authentic river appearance.
Thoroughly sand the wood to eliminate roughness and debris. Ensure the wood is immaculately clean and completely dry to avoid moisture interfering with the epoxy curing process.
Step #2: Seal the Wood
Apply a seal coat of epoxy to the wooden surfaces. This thin initial layer seals the pores of the wood, helping to prevent the formation of air bubbles during the subsequent, main pour.
For detailed instructions on applying a seal coat, refer to our comprehensive guide here.
Step #3: Construct a Mold
Construct a mold around your wood setup using materials like HDPE or melamine, which are sturdy and non-stick. Make sure the mold is tightly sealed with silicone or sheathing tape to stop any epoxy leaks.

Step #4: Mix the Epoxy and Add Color (Optional)
Opt for a high-quality epoxy resin suited for deep pours, such as a specific deep pour formula. Follow the manufacturer’s instructions closely when mixing the resin and hardener.

Adding Color and Effects
If desired, incorporate pigments, dyes, or special effects into the mixed epoxy. Translucent blues or greens are common for simulating water in river tables, but feel free to experiment with any colors or effects that suit your vision.
For tips on using mica powder pigments to achieve vibrant effects, check out our guide here.

Step #5: Pour the Epoxy River
Gently pour the epoxy into the designated river channel between the wood slabs. If using table top epoxy insead of a deep pour epoxy, it's best to pour it in stages, allowing each layer to partially set before adding the next. This method helps manage the exothermic heat reaction and prevents potential cracking or other flaws.
Step #6: Eliminate Air Bubbles
After each pour, swiftly use a heat gun or torch to remove any surfaced air bubbles. Continuously move the tool to prevent overheating any part of the epoxy.
For detailed techniques on removing air bubbles with a heat gun, click here.
Step #7: Control the Curing Environment
Let the epoxy cure for the duration recommended by the epoxy brand you are using, maintaining a stable environment—preferably at around 75°F and under 60% humidity. Keep the table stationary during curing to avoid disturbing the setting process.
For further guidance on epoxy curing times and tips, visit our FAQ section here.

Step #8: Sand, Clean, and Topcoat
After the epoxy has fully cured, remove the table from its mold. Sand the epoxy to achieve the smoothness and finish you desire. Optionally, apply a final top coat of epoxy or a finishing oil or varnish to both protect the wood and enhance its aesthetic appeal.
Unsure about sanding? Find more information in our sanding guide here.

Step #9: Final Assembly
Polish the epoxy to a high gloss to accentuate the river's depth and clarity. Attach legs or a base to finalize the construction of your table.
By adhering to these steps carefully, you'll successfully create a stunning epoxy river table that showcases both your craftsmanship and creativity.
Primaloc Epoxy: Premium Epoxy for Premium Results
With our premium Bar & Table Top Epoxy and our Deep Pour Epoxy, Primaloc gets the job done. Our epoxy resins are premium-grade, with high performance in every category, including:
- Unmatched Strength: A Primaloc finish won't buckle, even under high pressure.
- Long-Lasting Resilience: Primaloc epoxy lasts for many years with minimal care, and can endure high-traffic environments with ease.
- A Crystal-Clear Coating: With its pristine, transparent appearance, looking at a cured Primaloc coating is like peering through a window.
Epoxy resin can be beautiful, strong, and long-lasting—which is why you shouldn't compromise on quality. With Primaloc Epoxy Resin, you get the ultimate finish in durability and visual appeal.
Protect your surfaces by giving them a rock-solid epoxy finish. Choose strong. Choose reliable. Choose Primaloc.


